|
|
Post by dawnluckham on Feb 1, 2008 16:16:16 GMT -5
Bone tip tutorial Steph, if this is too picture heavy let me know and I’ll see what I can do to reduce it. Please excuse the messy fuzzy bits all over my worktable. I’ve just finished working with a fabric that leaves little bits everywhere! I’m going to have to brush those little pieces right out of the cutting mat!  Materials: Spring Steel boning and spiral steel boning. Wire cutters to cut the spiral steel. Bolt cutters (not shown) to cut spring steel. Two sets of needle nose pliers and the aluminum tips. After cutting the bone to the desired length, Slide the aluminum tip onto the end of the spiral bone 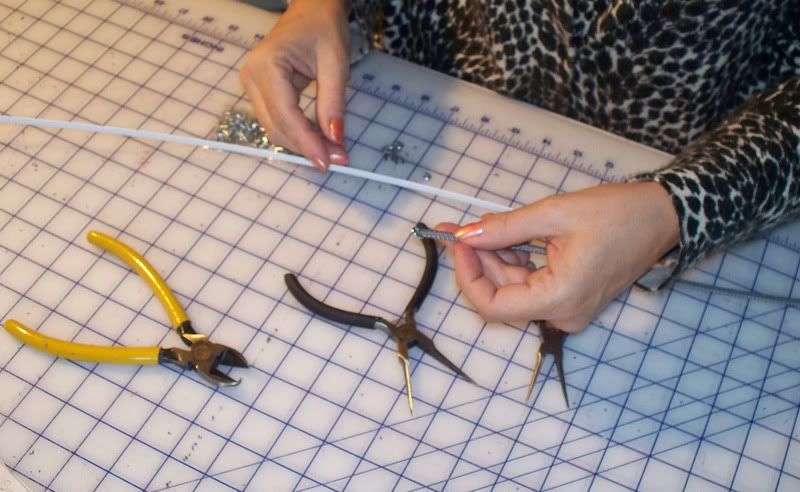 Pinch the sides of the aluminum tip with a set of needle nose pliers: 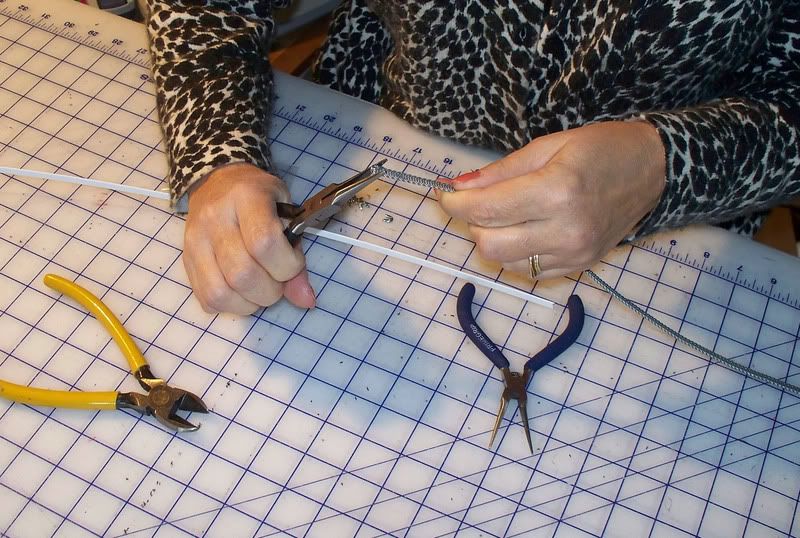 Gently pushing the aluminum tip toward the steel bone clamp down on the flat end enough to hold on to the whole thing. 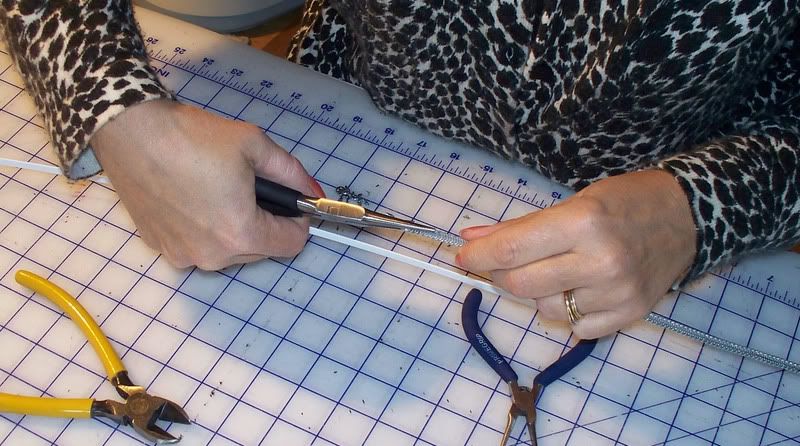 Pick up the second set of pliers and pinch the sides while at the same time applying pressure to the flat section. You're crimping the aluminum over the end of the bone.  Open and close the pliers and move them around a little bit in order to crimp down all sections and secure the tip to the end of the bone 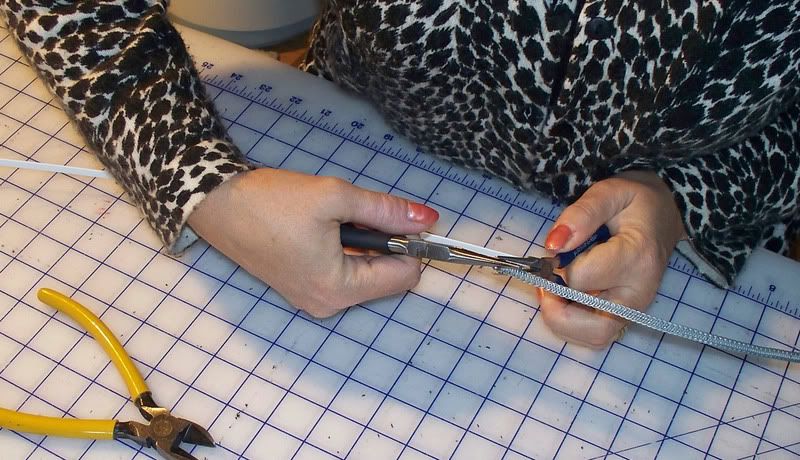 Finished! The tip is firmly attached to the end of the spiral bone.  The spring steel bone is done the same way. Slide the aluminum tip on the end of the boning. 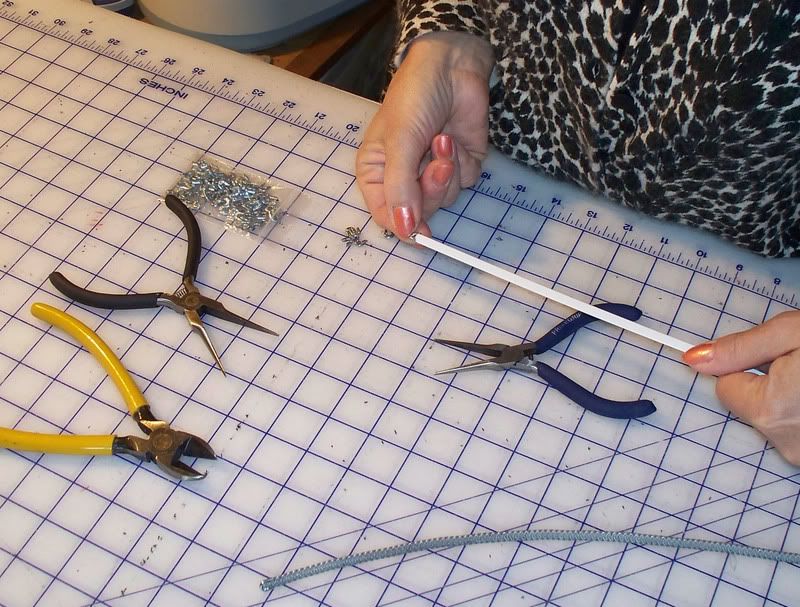 Pinch the sides: 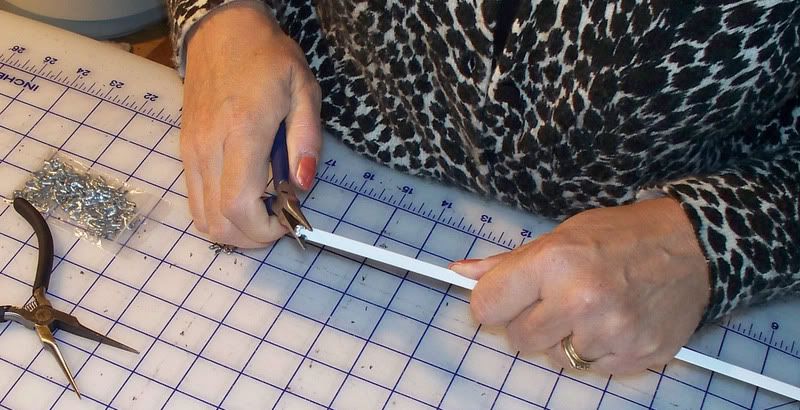 Pinch the flat: Pick up the second set of pliers and pinch both the sides and the flat of the bone end 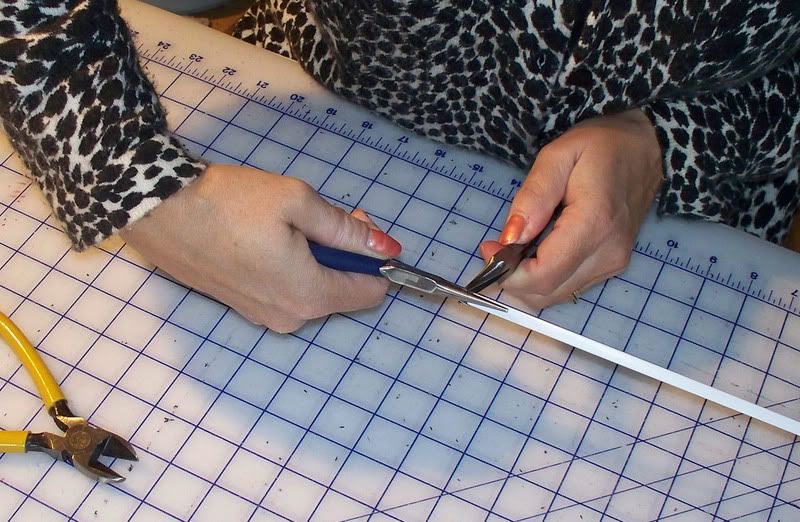 Move the pliers around, opening and closing in order to crimp the aluminum tip over the bone end 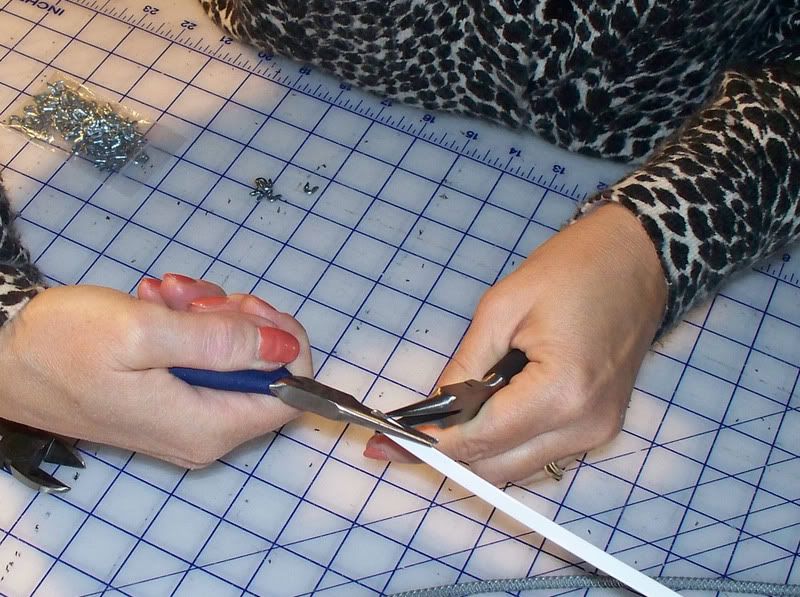 Finished. 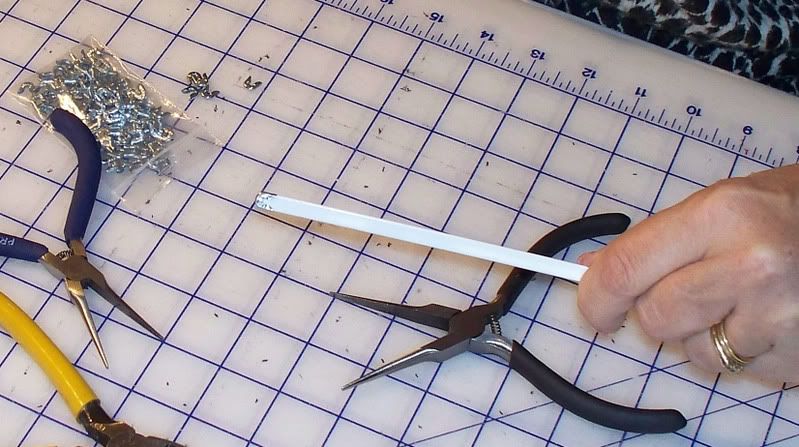 |
|
|
|
Post by cosmoblue on Feb 1, 2008 16:54:21 GMT -5
Thanks Dawn! I am going to try it again, I was doing it a little differently.
|
|
|
|
Post by cosmoblue on Feb 1, 2008 21:34:56 GMT -5
Thanks Dawn, this totally worked. My bones are tipped! Yay!
|
|
|
|
Post by dawnluckham on Feb 1, 2008 23:37:10 GMT -5
Glad it worked for you, Cosmo!
|
|