|
|
Post by Mme de Beaufort on Jan 29, 2008 13:12:31 GMT -5
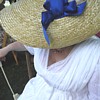
I decided to have a whack at making a bonnet, and thought it would be fun to try one using remnants and a piece of embroidered organza that has acted as a fishu and various other things through its life with me. This is a quick cheater project and I used a glue gun where I should have used a needle and thread, forgive me. I started with a cheap straw hat from Michaels ($1.29) I cut off the bottom using the head-form to shape it. I just 'winged' the shape. My next one will be slightly different. I tied it down with a scrap of bias tape from my stay project. I bound the edges with a ribbon folded and glued over the edge all the way around. 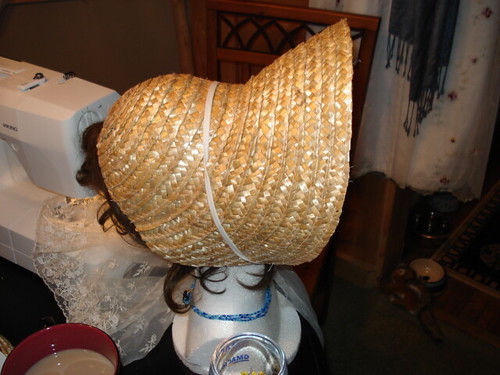 I then got my embroidered fishu and stitched it for gathering.   I then spread the gather along the edge of the brim with pins. I then glued the gathered organza down along the brim and into the back of the bonnet. I cut a long rectangle of fabric and folded it over, gathering the cut edge, and then placing a lace through the fold, tightening it to form a dome. I placed it over the back of the bonnet. 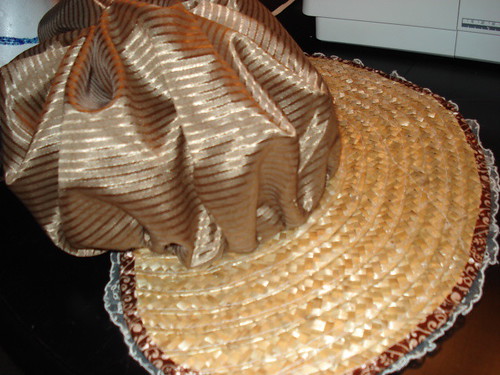 I then wrapped the raw edge with a ribbon. I had to later adjust the 'dome' over the brim, and draw it further onto the straw part in order to get the visor part of the bonnet to shape itself properly. 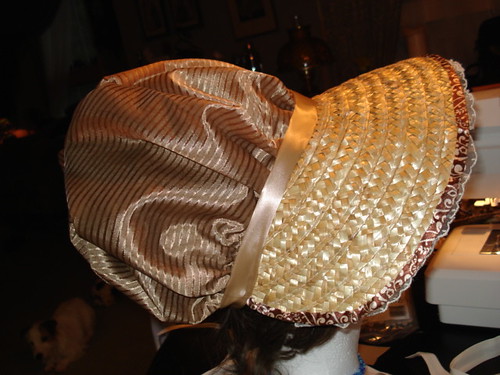 I then created a bow 'florette' on two lengths of ribbon, and sewed them to each side. Here is the bonnet on my head. 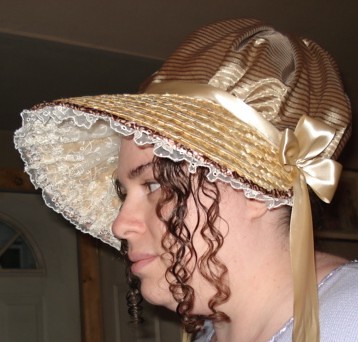 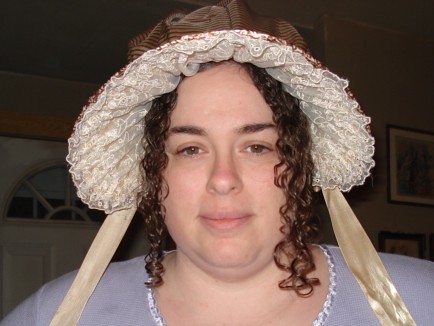 Final product without my nugget head in it: 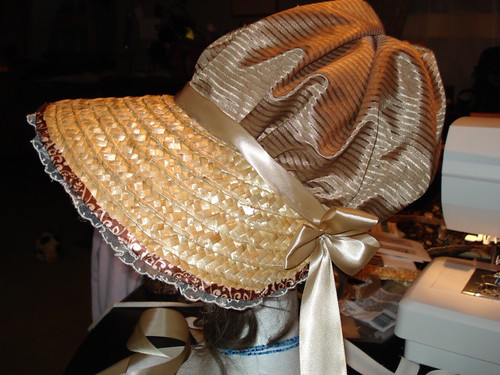 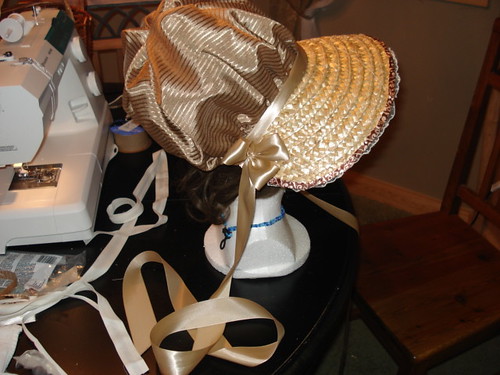 And outside in daylight for more accurate colour representation...   |
|
|
|
Post by cosmoblue on Jan 29, 2008 13:14:15 GMT -5
So cute! What a great idea!
|
|
|
|
Post by Mme de Beaufort on Jan 29, 2008 13:16:39 GMT -5
I'm going to add it with a matching reticule to the raffle for the Party on the 9th.
|
|
|
|
Post by Miss Ida on Jan 29, 2008 14:45:39 GMT -5
its gorgeous, so this was the bonnet project you described in your letter
|
|
|
|
Post by iamdiverted on Jan 29, 2008 15:43:07 GMT -5
Oh, I'm so jealous of your natural curls. How nice they look! I'm sad I won't be able to be at the party!!!!! I would reaally like to win that bonnett.  |
|
|
|
Post by Mme de Beaufort on Jan 29, 2008 16:31:09 GMT -5
its gorgeous, so this was the bonnet project you described in your letter This was only a test... so to speak. I intend to make another for me now that I am more confident that it can be done. I will choose a fabric that I like instead of a remnant, and I will probably cover the whole thing instead of just the inside and back. It came out quite nice for a test though. I'm sure someone will like it. |
|
|
|
Post by Val on Jan 29, 2008 20:26:49 GMT -5
Wow, that's really pretty. I love the lacey stuff you used inside.
|
|
|
|
Post by Mme de Beaufort on Jan 29, 2008 21:57:58 GMT -5
I forgot to mention that the hat had a fairly wide brim to begin with, so with my seam ripper, I removed two 'rows' of the straw from the edge too in order to bring the visor in some.
|
|
Lady Serendipity
Clergy
 "There is nothing like staying at home for real comfort". --Jane Austen
Posts: 120
|
Post by Lady Serendipity on Jan 30, 2008 8:56:47 GMT -5
I'm going to add it with a matching reticule to the raffle for the Party on the 9th. WOW, okay, first I was surprised at you sacrificing that lovely bit of lace to a hat (smashing though it may be!)....but to hear you're giving away the whole lovely THING!!!! Very nicely done, and with a matching reticule, it's sure to be a big hit!! |
|
|
|
Post by dawnluckham on Jan 30, 2008 22:57:01 GMT -5
Very sweet Steph!  Both you (for gifting the hat away to a fund raiser) and the hat, which turned out very well. I'm sure someone will be thrilled with it. |
|
|
|
Post by LadyGeremia on Feb 2, 2008 21:04:47 GMT -5
Wow! That is impressive for a first try. Makes me want to make one now. When you say you "cut off the bottom". Is that because it was a full brim hat or did you purchase one that was already a bonnet style? I've looked around for a bonnet to make, but I only find wide brim sun hats, kind of like farmers hats. Is that what you use?
|
|
|
|
Post by Mme de Beaufort on Feb 2, 2008 23:00:57 GMT -5
It was one of those cheap straw sunhats you find at craft stores, nothing more. I cut a good third off to shape the bonnet. If you look at this picture, you can see the wig sticking out the back, so you have an idea of how much I cut off. |
|
|
|
Post by Mme de Beaufort on Feb 5, 2008 13:03:42 GMT -5
I've started another bonnet, and have been much more fastidious about taking pictures of each step. Here is the first bit of the project: Here is the hat I started with. It's the same kind I had before, except it was a few cents more at Joanne Fabrics ($1.99) 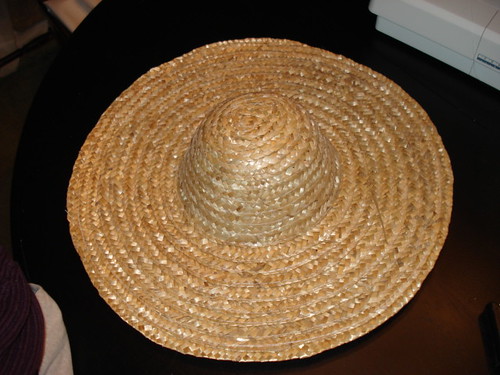 I pinched it together to start my cut, so they match on each side. It doesn't have to be pretty right away, you can trim to your liking. 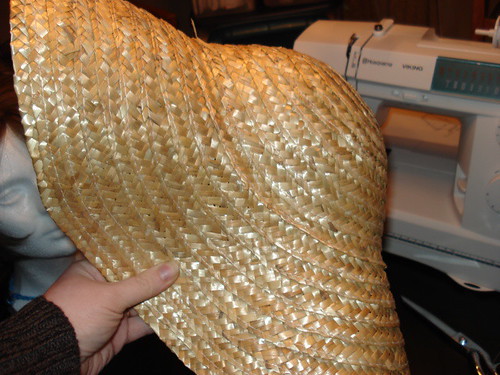 You can see what it looks like after I've hacked it. It's almost half, but not quite. Probably over a third is removed, and discarded. 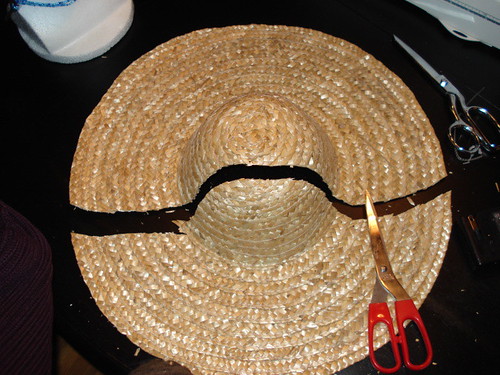 A quick test to see if I like the depth of the visor. The last bonnet, I removed two 'courses' of the straw, but I am going to leave this one as is. 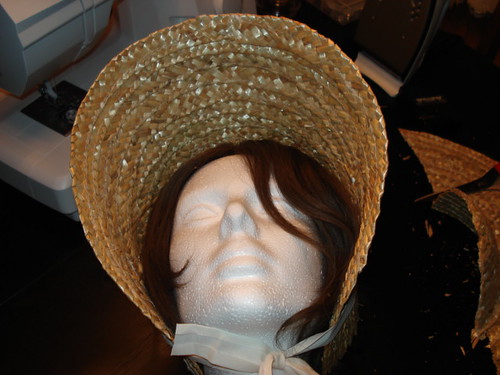 Another look at the side shows me where it needs to be trimmed and shaped. 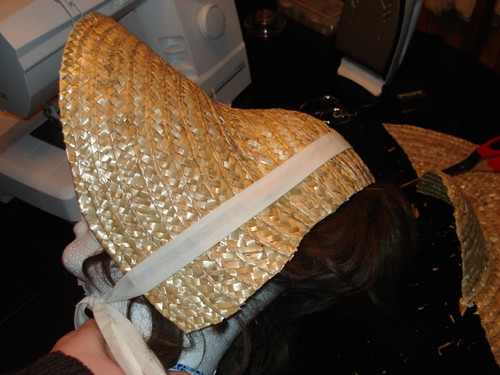 A look at the back does the same. 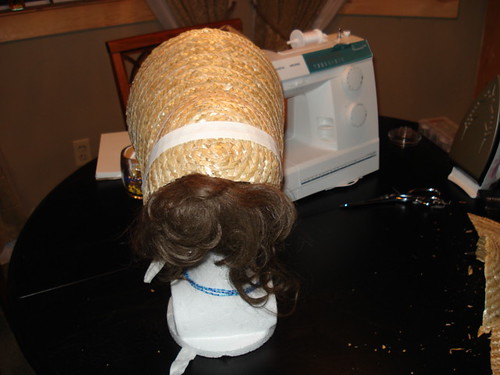 Trimmed:  Since I had an extra package of ivory bias tape, I figured I'd use that to seal the cut edges of the bonnet. 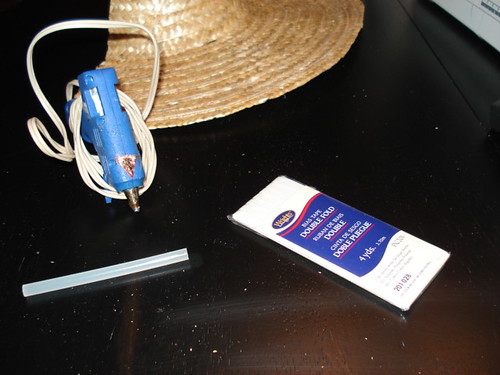 I start gluing. It will keep the hat from unraveling. 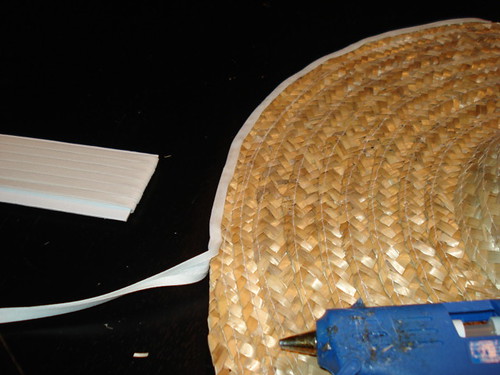 |
|
|
|
Post by Mme de Beaufort on Feb 5, 2008 13:11:07 GMT -5
The edges are now bound. 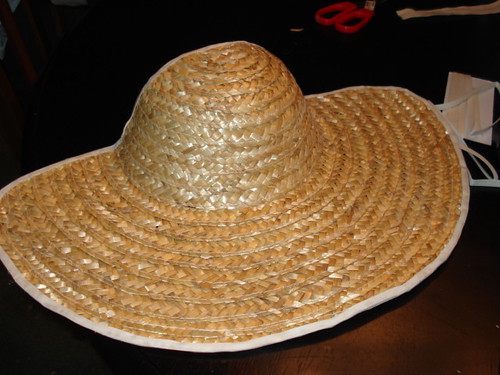 I have the other piece of that original lace (not quite as pretty, but still nice) left, so I use it to line the underside of the bonnet. I gather it on the edge, and at the depth of the brim, so I can have to gather points. I gather, and start to glue the gather down along the front edge. 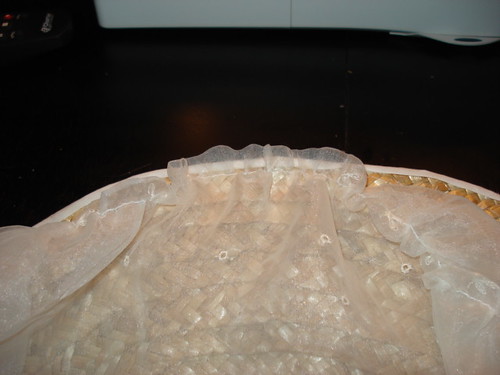 Once the edge is glued on, and gather the inner part. 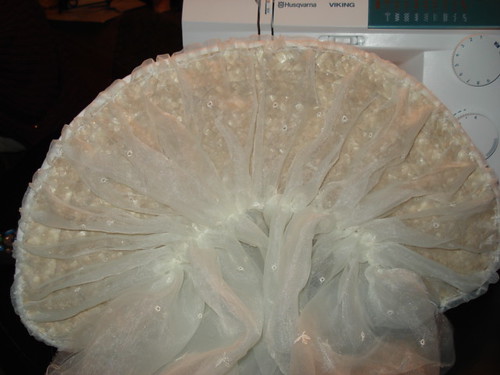 The inner brim is now glued, leaving he remaining fabric. I have to glue it all down within, and trim it at the back edge of the bonnet.  Once the gluing and trimming is done, I add one more strip of bias tape to capture the raw edge of the lace and make a clean look. 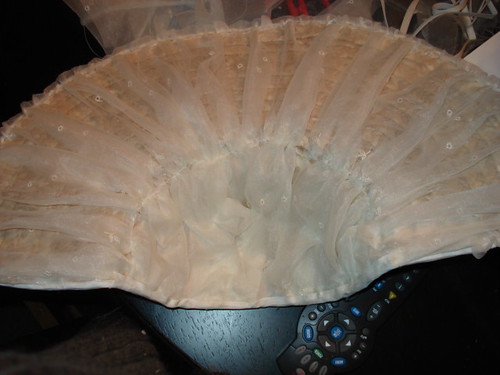 This is what I've done so far. Tonight, I'll do the capote part, if I'm feeling inclined. Here's what it looks like at the moment: 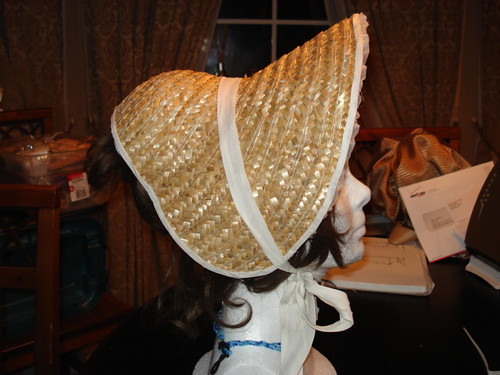 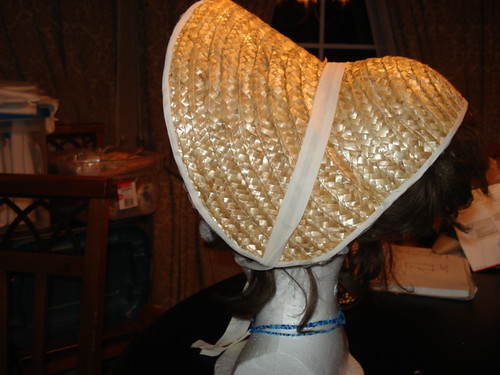 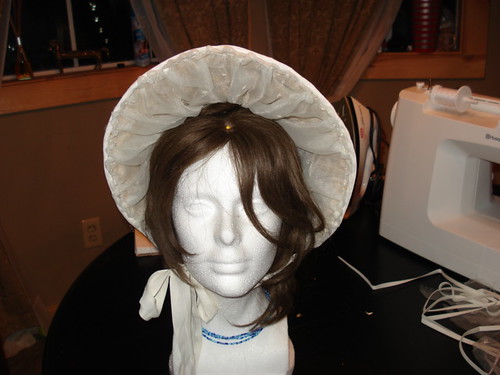 TO BE CONTINUED!!! I will post the fabric crown images as soon as I have them. Stay tuned. |
|
|
|
Post by Val on Feb 5, 2008 21:26:53 GMT -5
Steph, I'd been thinking about doing a Regency bonnet workshop for my costume guild. We teach each other to save money, and this being a quick one will appeal to a lot of our sewing challenge peeps. It's nice to see it's working with a glue gun. I always thought that was one of the best inventions they came up with in a long time. Thank you for documenting this so clearly.
|
|
Lady Serendipity
Clergy
"There is nothing like staying at home for real comfort". --Jane Austen
Posts: 120
|
Post by Lady Serendipity on Feb 5, 2008 21:38:33 GMT -5
As a non-sewer, this is DEFINITELY my kind of project! ;D
Are you using a hot glue gun, or a low-temp one?
|
|
|
|
Post by Mme de Beaufort on Feb 5, 2008 21:45:04 GMT -5
As a non-sewer, this is DEFINITELY my kind of project! ;D Are you using a hot glue gun, or a low-temp one? ::glances at tender, red fingertips:: I am going to go with hot on this one. I didn't know there was a low-temp one. Does it grip as nicely as hot glue does? |
|
Lady Serendipity
Clergy
"There is nothing like staying at home for real comfort". --Jane Austen
Posts: 120
|
Post by Lady Serendipity on Feb 6, 2008 1:13:23 GMT -5
As a non-sewer, this is DEFINITELY my kind of project! ;D Are you using a hot glue gun, or a low-temp one? ::glances at tender, red fingertips:: I am going to go with hot on this one. I didn't know there was a low-temp one. Does it grip as nicely as hot glue does? I've seen them, but never used one, so couldn't tell you! And lol, I was looking at your beautiful perfect gathers and imagining your poor burnt fingers! ;D May I compliment your non-gloppy hot-glueing skills, as well, lol! |
|
|
|
Post by Mme de Beaufort on Feb 6, 2008 16:19:21 GMT -5
The gather is made with thread first. It's much easier to glue it down pre-gathered. There's no way I was going to glue each gather, I'm too lazy! ;D
|
|
|
|
Post by Mme de Beaufort on Feb 7, 2008 11:50:58 GMT -5
Okay. So now that I've done the straw bit, I'm ready to move on to my 'capote' part of it. I want it to be more 'stovepipe'-like than a big puff, so I'm going to do it a bit differently than the last one. First, I take my $2.39 piece of fabric remnant from Joanne Fabrics. The camera doesn't do it justice, it's a really nice piece of material. 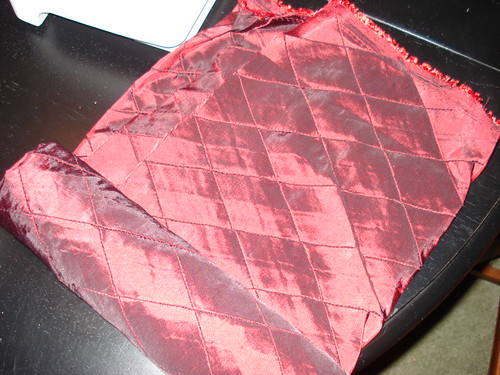 There's going to be some minor sewing involved, as well as some measuring; so I've got everything together (plus it's a perfect chance to show off my brand-new ghinger scissors, aren't they pretty?) 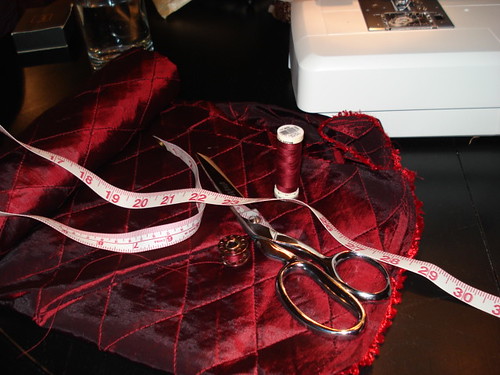 I measure my 'crown' while wearing the bonnet. I want the capote part to be fitted around the base. I cut the piece I need accordingly. I cut it on the fold. 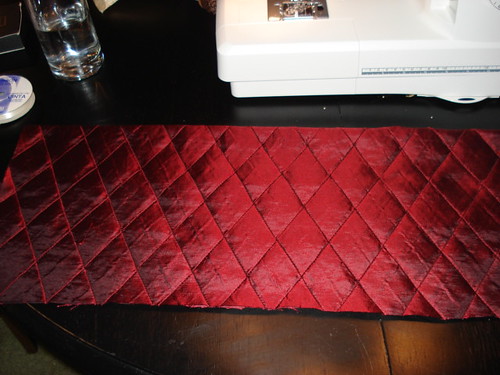 I then sew the bottom edge together, and then fold it so the short ends are together, and seam those two together, however I stop short of the open folded-ends.  I've left two little openings for a gathering string. 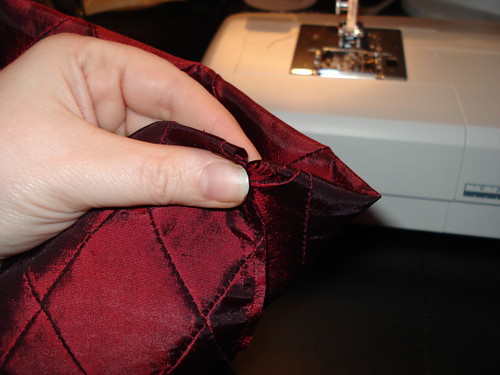 I am going to use a large bobby-pin as a threader, and some cheap craft-ribbon to gather the top. 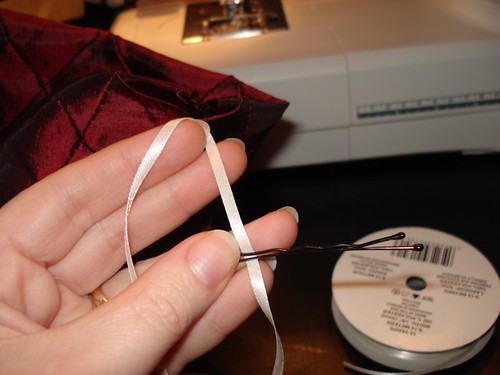 I thread the ribbon through the bobby pin and insert it into the opening. I did not sew a channel because I didn't want a tight gather. Here is the ribbon threaded through. 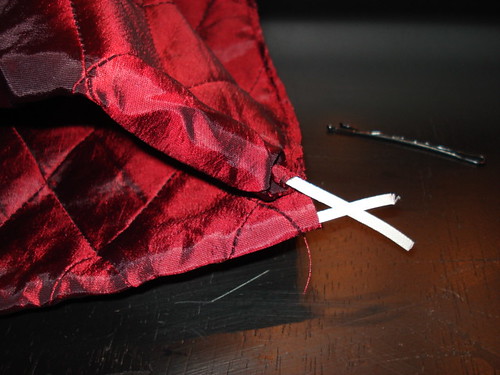 A quick cinch of the ribbon, I tie it off tightly. I then trim the ribbon ends. 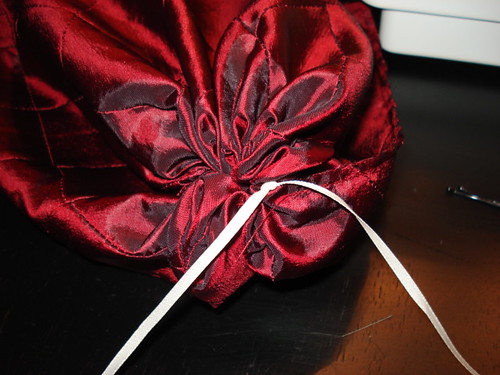 I turn the capote right-side out to hide the seam, and voila.  A little test to see how it fits: 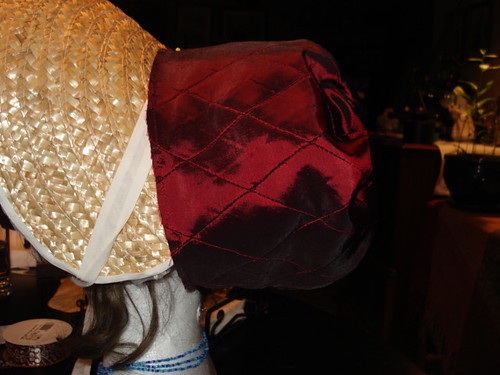 I then make a band to go around the base; my apologies, I got so involved in making it I forgot to take pictures. It works the same way the ribbon did on the prior bonnet, and a piece of ribbon would work just as well. I chose to make one out of the same fabric. I pin it to the bottom edge, and then sew it on. In the case of using ribbon, you can affix your capote on the straw, and then glue your ribbon on; it works fine both ways. 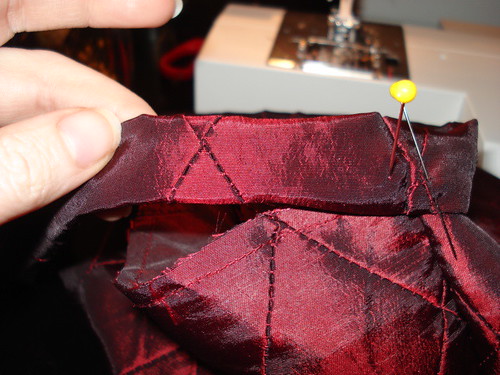 I glue the capote on. 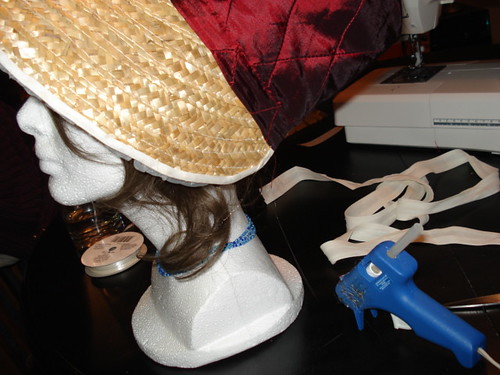 Here it is at this stage: 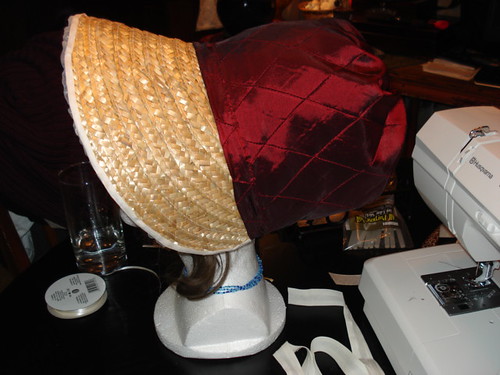 I still need to add the ribbon ties, and I may add a flower or two. |
|

 Where so many hours have been spent in convincing myself that I am right, is there not some reason to fear I may be wrong? ~ Jane Austen