I don’t know if I mentioned this in the past, but I’ve taken wonderful millinery lessons here:
www.judithm.com/ Highly recommended!

To block a straw hat look around your home – keep a look out in stores when you’re shopping for “hat shapes”. This could be a flower pot, a baking bowl, lamp shade, kitchen canister, the can left over from coffee – wherever you see the ‘right shape’.
That capote was most likely shaped over something like this:
tinyurl.com/ohzlfp or like this:
www.cammiesantiques.com.au/images/Hat-block-Feb-09.jpgThese sorts of things show up on eBay all the time.
tinyurl.com/pv3vbjGet yourself a plastic dish pan like this:
www.amazon.com/11-5-White-Plastic-Rectangular-Dish/dp/B0000CFSCSBuy some of this:
www.judithm.com/shop/?page=shop/flypage&product_id=2580&category_id=f165b1e85b9494c704a7a0f038cf8bccFind rough straw “hoods” or unblocked hat bodies like shown here:
www.judithm.com/shop/?page=shop/browse&category_id=09eaf256943292b9d4d9eacca6910018I’ll vouch for the good quality of even the least expensive of these: But keep your eyes open in your local supply shops. I’ve been able to find a local source of $0.99 hoods that are pretty rough quality but excellent for practicing on.
Get some thumb tacks if you’re working with wooden shapes. If you have “other” hat shapes, get some of these elastic hair bands (not the pony tail holders, but the actual hair bands) at the dollar store:
tinyurl.com/q3rff2Get some inexpensive tin foil to cover your shapes in (or you can wrap them in Suran Wrap or something like.) It helps to prevent the dried hat from sticking to the form when you want to remove it.
Put hot water in your dish pan.
Measure and mix in the gelatin.
Dunk your straw into the water and soak for a few minutes making sure it all gets wet.
Take out and stretch over your shape pulling downward.
Secure all the way down with the hair bands and tack (if possible, depending what your hat block is made of) where needed.
Allow to dry (I like doing this in the sun on my back deck. It’s messy and wet and the sun helps speed drying time.)
Remove hat from block when dry.
Decide where the edge of the hat is and fold under at that edge.
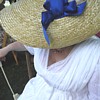
(A clothes steamer helps at this stage. You can steam the straw and bend it into any shape you want. – That’s where that little folded up back on the capote comes from. But know, I’ve JUST bought my own steamer. I was using the steam function on my iron before, or boiling water on the stove for steam.)
Marianne’s capote does not have a wired edge, but this is helpful for just about every other style of cap you’d make:
Insert hat wire into the folded edge and decide how long a piece of wire you need – plus an inch or so of overlap. Cut wire, overlap and secure (by running under the zig-zag stitch on the sewing machine – wear safety glasses! Hat making breaks needles!) – Or hand sew the wire together.
Return wire to the fold on the hat and machine or hand stitch the fold over with the wire inside the hat edge. I sew about 3/8 of an inch away from the folded edge.
Once the wire is in the hat, you can trim off the excess straw about a quarter inch from the stitching line.
You can insert a ribbon hat band at this point (makes fitting better! And catches sweat.) and decorate the hat.


 Where so many hours have been spent in convincing myself that I am right, is there not some reason to fear I may be wrong? ~ Jane Austen


 They DO look nice, don't they?