|
|
Post by Mme de Beaufort on Feb 28, 2008 12:41:44 GMT -5
 I've been struggling to make a bonnet similar to the ones pictured in this post, with the stovpipe back. They're not as easy as they seem. I don't have pictures yet... I've done the buckety part already, and put on the silk covering. I made the bucket by unwinding a cheap straw sunhat and reshaping it into my desired shape. The challenge now is figuring out 1: the angle of the crown and brim or whatever that part's called and 2: the right depth to cut the crown allowance into the stovepipe. I'm glad I have my head-model I dare say. I'm using the silk from my pelisse that I wore that the Winter Ball last year. It's a very pretty fabric. With 2 picnics and a tea coming up, I'd like to have my cap and bonnet finished. I'd also like to add those two lace ties that Mrs. Phillips has dangling down the back of her shoulders from her bonnet in P&P... I need to take a closer look at that.  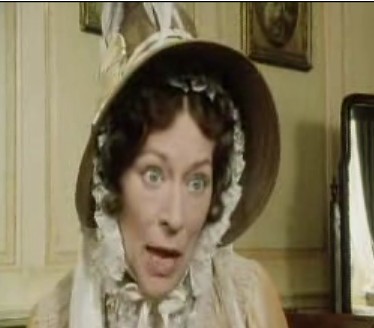  |
|
|
|
Post by cosmoblue on Feb 28, 2008 14:08:35 GMT -5
Sounds like another of your great adventures. I can't wait to see the result.
|
|
|
|
Post by Goblin, esq. on Feb 28, 2008 14:24:03 GMT -5
I'd also like to add those two lace ties that Mrs. Phillips has dangling down the back of her shoulders from her bonnet in P&P... I need to take a closer look at that. Are you sure those are not lappets from the cap worn under the bonnet? |
|
|
|
Post by Mme de Beaufort on Feb 28, 2008 15:41:30 GMT -5
I know I've seen the lapettes, but on this particular bonnet the ties are lace on the ends. It's quite pretty.
|
|
|
|
Post by Mme de Beaufort on Feb 29, 2008 2:30:40 GMT -5
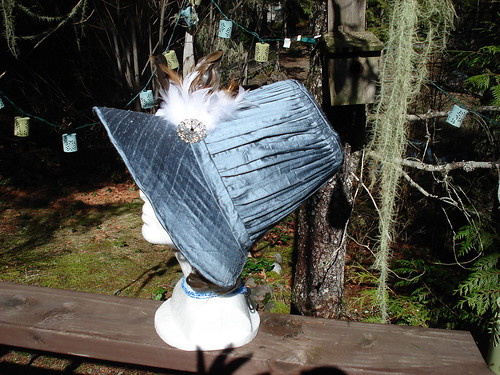
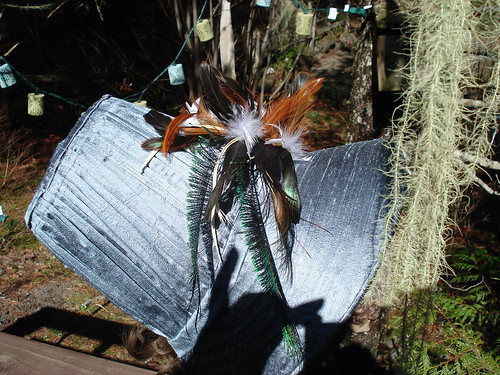
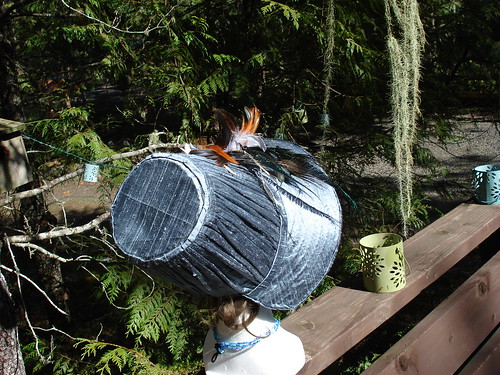
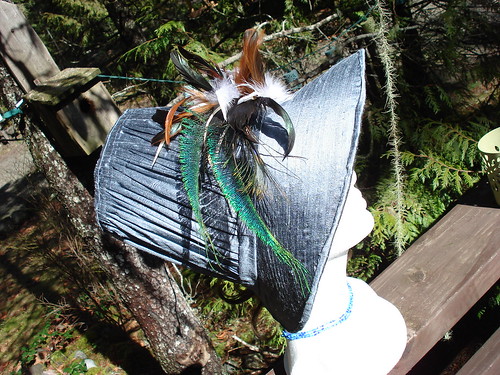
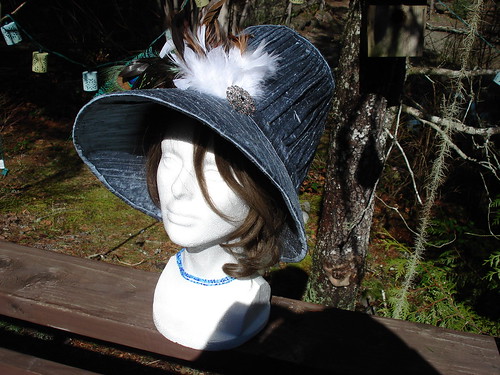
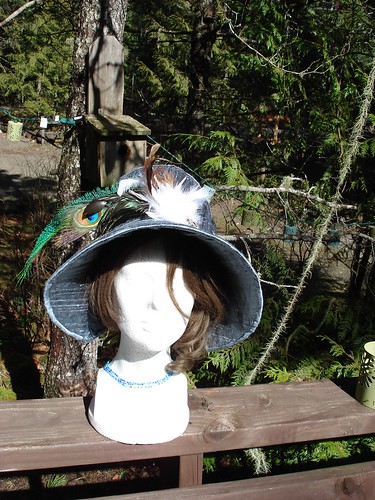
Wow. I'm sort of impressed with myself... I know this sounds obnoxious, but I finished covering the brim (I'm still trying to figure out how I'm going to clean up the edge, but I'll figure it out. And I then pinned the brim to the back, and put it on Miss Foamhead, and then placed some feathers on it, and it's really quite good looking.
I need to work on it some more, but it's pretty cool looking. Pics soon (we need it for a facility inspection tomorrow--my coworker has it). I'll try to borrow it for the weekend.
|
|
|
|
Post by Mme de Beaufort on Mar 2, 2008 15:24:48 GMT -5
I just took pictures of the almost finished result. I still need to make the ties and bows to attach to it, but it is essentially done. It turned out pretty spectacular for a first-time effort, and when I'm done, it's onto the cap so I can have the complete look. I'll post pictures tomorrow. I took pictures outside in the sun so it can be seen with accurate light, etc. The feathers... Love them. They move so nicely in the breeze. Yay!
I want to do another one now, in a different colour silk.
|
|
|
|
Post by Mme de Beaufort on Mar 3, 2008 11:02:47 GMT -5
|
|
chiemi
Clergy
 "Shelves in the closet. Happy thought indeed. "
Posts: 140
|
Post by chiemi on Mar 3, 2008 11:09:36 GMT -5
Oh my gosh, that looks fabulous! I absolutely love it. I wish I had your skills.
|
|
|
|
Post by Mme de Beaufort on Mar 3, 2008 11:33:52 GMT -5
No special skill needed, just a willingness to flub things up and start over again if need be.
|
|
maudelynn
Clergy
~ I may not always make good sense but I ALWAYS make good tea!~
Posts: 193
|
Post by maudelynn on Mar 3, 2008 12:02:40 GMT -5
No special skill needed, just a willingness to flub things up and start over again if need be. That is lovely! As for flaws, I see none but we are always harder on ourselves. The colour is smashing! |
|
|
|
Post by dawnluckham on Mar 3, 2008 12:09:42 GMT -5
Oh MY Goodness!!! Steph, thats FANTASTIC! Beautiful, beautiful work!!! It's the nicest thing you've posted yet (and you've shown some very nice things.)
I just love it!
|
|
|
|
Post by Mme de Beaufort on Mar 3, 2008 13:18:14 GMT -5
Thanks Dawn, from you that means A LOT. ::GRIN::
|
|
|
|
Post by cosmoblue on Mar 3, 2008 13:20:43 GMT -5
Steph, that is very impressive. It is going to look great on you.
|
|
|
|
Post by Mme de Beaufort on Mar 3, 2008 13:27:39 GMT -5
Aww... That's sweet! I need to make a cap too... So I can have the ruffles. I want to make another though, I think it would make a really desirable raffle item and it was hard, but fun work.
I'm particularly proud of having built the crown from the straw tape from a $2 hat. The whole thing probably cost me about $8 (not counting the silk, but I salvaged that from the pelisse I wore at the November ball.
It's all glue, though, I did cheat. But it's very solid.
|
|
Miss Credit
Clergy
"To be fond of dancing was a certain step towards falling in love"
Posts: 118
|
Post by Miss Credit on Mar 3, 2008 13:29:52 GMT -5
That is absolutely STUNNING! I could only dream of making something that beautiful. Having never made a bonnet myself I would be very interested in learning what exactly you did to make that lovely head piece. Again amazing job, Im sure that you will be the envy of every lady whenever you that.
|
|
|
|
Post by Mme de Beaufort on Mar 3, 2008 13:44:26 GMT -5
Supply List:
2 Straw sun-hats, 1 18" ~ 1 12"
1 Feather-pick (from michael's floral section)
2-3 longer, decorative feathers
Silk or other fabric covering.
Ribbon for the ties and bows if necessary...
Glue sticks and glue gun.
--What I did---
I cut a wide brim from the 18" hat. Test it around your own face to get an idea of what you want for size... and you are going to cut off the entire crown part of the original hat. You should have a C-shape.
I made the crown of the bonnet by unraveling the straw tape on the smaller hat. If I do it again, I will not build it free-hand, I will build it on an existing cardboard mock-up to avoid inconsistencies. I decided the size and length of it by just putting it on my head and seeing what lookd good. You create a slightly tapering tube. Create a disk to cap off the top.
I trimmed a bit off the top edge to angle the crown better against the brim, and cut a neck-notch into the bottom of it.
I covered them both and then tested them on Miss Foamhead... I needed to trim the brim a bit to make it work, and then glued them together. I covered the glue line with a fabric 'tape' and then covered raw edges in a quickly made 'tape' from the fabric (gathered fabric at the crown and the glue line b/w top and brim.
That's about it. There was some trial and error. I'm want to make a pattern of it so it's easier next time.
|
|
|
|
Post by Mme de Beaufort on Mar 3, 2008 16:27:03 GMT -5
Here is a link to a very messy hand-drawn diagram of how to make the bonnet. It's a .pdf file. Enjoy. ::smirk:: It's really messy. www.mediafire.com/?jk34chxbmbmClick begin download, and then click 'open'. |
|
|
|
Post by Mme de Beaufort on Mar 4, 2008 14:29:08 GMT -5
Cosmo helped me pick out some coppery brown ribbon for the bonnet, which I will install soon. I do enjoy shopping* with Cosmo. Anyway, the ribbon fits quite beautifully with the feathers that are already on it. I also bought velvet in the same tone for a spencer. Yay!
*By 'shopping' I mean walking around the store while talking excessively and casually glancing at various random items for an extended period of time, and then eventually ending up talking out by the car for more time. She's good fun, that girl.
|
|
|
|
Post by cosmoblue on Mar 4, 2008 15:29:23 GMT -5
*By 'shopping' I mean walking around the store while talking excessively and casually glancing at various random items for an extended period of time, and then eventually ending up talking out by the car for more time. She's good fun, that girl.LOL  I am glad you had a good time. I know I did. |
|
Miss Credit
Clergy
"To be fond of dancing was a certain step towards falling in love"
Posts: 118
|
Post by Miss Credit on Mar 4, 2008 15:55:30 GMT -5
Oh thank you so much; the instructions in addition to the diagram make perfect sense! I will have to pick up some straw hats and try my hand at this bonnet making.
|
|

 Where so many hours have been spent in convincing myself that I am right, is there not some reason to fear I may be wrong? ~ Jane Austen